Selasa, 30 April 2013

2013 Toyota Corolla Trunk Pop Wiring (Non-SmartKey)


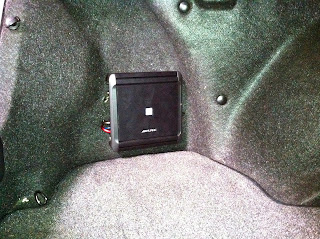
If you're going to be installing an aftermarket keyless entry/alarm system in one of these vehicles and want to tie in the power trunk pop you will need a SPDT relay.

2013 Toyota Corolla Aftermarket Alarm Trunk Pop

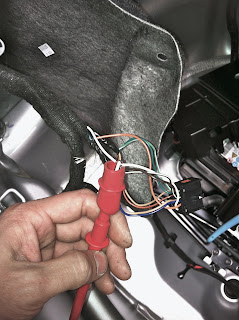
2013 Toyota Corolla Trunk Pop Wire
First locate the Pink trunk pop wire in the driver kick, it should be in a gray 22 pin harness (pin 20) and should meter 12v when the trunk pop button is pressed on the factory keyless remote. 

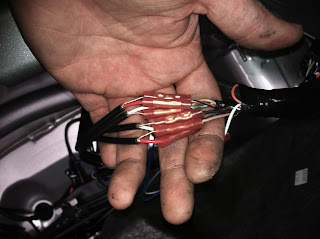
2013 Toyota Corolla Trunk Pop Wire Relay Wiring
You will need to cut the Pink trunk pop wire. Side A. of the pink wire should still meter 12v when the trunk pop button is pressed, and side B. shouldn't meter any voltage. 
Wire a SPDT relay as follows-

86- Constant 12v
85- Negative trigger from alarm/keyless system
30- Side B.
87a- Side A.
87- Constant 12v

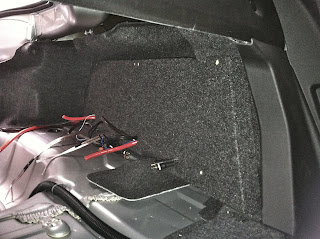
    2013 Toyota Corolla Trunk Pop
This will allow the factory trunk pop to operate as designed, until the aftermarket system triggers the relay. Then it will send 12v just to the motor side of the Pink truck pop wire. If you don't cut the pink wire, and just put a 12v trigger to it you will create a short circuit because that wire rests at ground.  Hope this helps!
-

Jumat, 26 April 2013

1998-2005 Lexus IS300 Main Amp Power Run Through Firewall To Rear


Toyota and Lexus vehicles are typically pretty easy to work on. Running cables/wires through the firewall to the rear is a pretty quick process. This is how I get my wires to the trunk.

Lexus IS300 Running Power Wire For Amp Through Firewall Into Car

Lexus IS300 Running Power Wire For Amp Through Firewall Into Car
Once you locate the rubber grommet securing the factory wires through the firewall, look for an empty/hollow rubber sleeve/nipple. You can normally find one or two. You will want to cut the tip off, I normally use a pair of flush cuts.  

Lexus IS300 Running Power Wire For Amp Through Firewall Into Car
After the tip is removed, you should be able to gain access to the interior of the vehicle through that hole.

Lexus IS300 Running Power Wire For Amp Through Firewall Into Car
Now that you have the main power wire inside the vehicle, you should be able to easily run the power wire along with any additional wires under the plastic side panels to the back seat of the vehicle. Remember if you're installing an amp to power your Mid's and Hi's then you will want to run the RCA's down the opposite side of the power wire to avoid any unwanted noise. 

Lexus IS300 Running Power Wire For Amp Through Firewall Into Car
Once the wires are at the back seat,

Lexus IS300 Running Power Wire For Amp Through Firewall Into Car

Lexus IS300 Running Power Wire For Amp Through Firewall Into Car

Lexus IS300 Running Power Wire For Amp Through Firewall Into Car
Pull back on the seat, you should be able to see a big access hole to the trunk.

Lexus IS300 Running Power Wire For Amp Through Firewall Into Car

Lexus IS300 Running Power Wire For Amp Through Firewall Into Car
You should be able to easily fish the wires through to the other side, behind the liner in the trunk.

Lexus IS300 Running Power Wire For Amp Through Firewall Into Car
If I am installing a small amp, I typically mount it on the driver side rear panel in the trunk. This vehicle already had an aftermarket stereo, so I just installed an amp/sub. Hope this helps!
-  

Minggu, 21 April 2013

2012 Chevy Camaro Factory Amp Bypass - Aftermarket Amp Install


I recently had the pleasure of working on one of these vehicles. I bypassed the factory Boston Acoustics amp and installed a couple aftermarket JL Audio amps, the 300/4 and the 500/1 to be exact. It was a pretty easy install considering all the wires I needed were located in the trunk of the vehicle.  

2012 Chevy Carmaro System Factory Amp Bypass JL Audio Install

2012 Chevy Carmaro Battery Location
The battery is located under the spare tire. 

2012 Chevy Camaro Factory Amp Location
The factory amp is located in the trunk on the driver side, behind the trunk liner. 

2012 Chevy Camaro Boston Factory Amp Bypass
First disconnect the harnesses going to the factory amp. In the secondary wire harness, which should be the harness without the main heavy gauge power wires. You should be able to locate the factory amp turn on wire, it is a white wire. When testing with a meter it will have about a 30 second delay once the key is removed, until it will shut off.

2012 Chevy Camaro Boston Factory Amp Bypass
I then located all my signal wires going into the factory amp.
Front Left (+ Tan )(- Dk. Green)
Front Right (+ LT. Green/White)(- Orange/Black)
Rear Left (+ Brown/White)(- Brown)
Rear Right (+ DK. Blue)(- Tan)
After I tested the wires, I cut them from the factory amp harness and tipped them with RCA's so they can be connected to the JL Audio amps.
Then you must find all your speaker wires, I didn't use or connect the factory center speaker. You will have a total of six pairs of speaker wires you need to identify, because if you look at the rear factory speakers you will notice they have two pairs of wires going to each speaker. Each rear speaker is made up of a tweeter and a midrange driver and each component is independently wired to the factory amplifier. If you want to safely connect the rear tweeters like I did, you will want to use crossovers to eliminate the low frequency that could potentially damage the factory tweeters.
Front Left (+ Tan)(- Gray)
Front Right (+ LT. Green)(- Green)
Rear Left (+ DK. Blue/White)(- LT. Green/Black)
Rear Right (+ DK. Green)(- LT. Blue/Black)
Rear Left Tweeter (+ DK. Blue)(- DK.Blue/White)
Rear Right Tweeter (+ LT. Blue)(- LT. Blue/Black) 

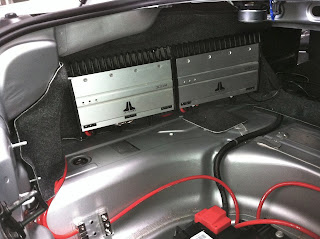
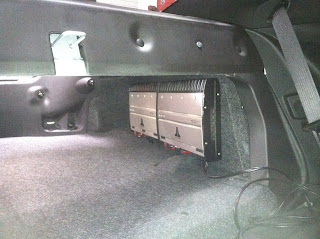
2012 Chevy Camaro Sound Sytem Used JL Audio Amps
I couldn't really find any good spots to mount these amps, so I had to make a beauty board.

2012 Chevy Camaro Aftermarket Amp Sub Install

2012 Chevy Camaro Aftermarket Amp Sub Install

2012 Chevy Camaro Aftermarket Amp Sub Install

2012 Chevy Camaro Aftermarket Amp Sub Install

2012 Chevy Camaro Aftermarket Amp Sub Install
Once my board was mounted, I mounted and wired up my amps.

2012 Chevy Camaro Aftermarket Amp Sub Install

2012 Chevy Camaro Aftermarket Amp Sub Install

2012 Chevy Camaro Basic Custom Subwoofer Sealed Enclosure
Then I had to build a box, the customer wanted something basic.

2012 Chevy Camaro Basic Custom Subwoofer Sealed Enclosure

2012 Chevy Camaro Basic Custom Subwoofer Sealed Enclosure
 So I built a basic sealed enclosure for two tens (1.3CF). 

2012 Chevy Camaro Basic Custom Subwoofer Sealed Enclosure
Turned out very nice, and sounded great! With the door chime, OnStar and RAP system all still fully functional. Let me know if you have any questions.
- 's

Rabu, 10 April 2013

Kia Rio Stubborn Manual Window Handle/Crank Removal

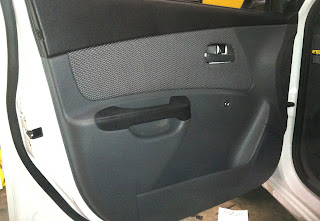
If you have recently had the pleasure of removing the door panel on a newer Kia Rio with manual window handles, then I'm sure your gonna know what I'm talking out in this post.

Kia Rio Manual Window Handle Crank Removal

Kia Rio Manual Window Handle Crank Removal
What makes removing this handle so difficult is the fact the retention clip is recessed, and the handel is very tightly fit up against the door panel. It's nearly impossible to see the clip without damaging the handle or the door panel, and if you can't see the clip and can't feel the removal tool catching on anything then it becomes pretty frustrating. 

Kia Rio Manual Window Handle Crank Removal
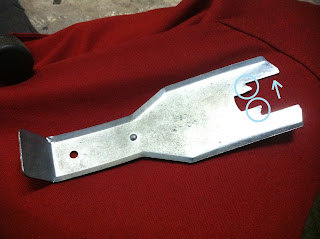
This is how I ended up removing the handle. Take your standard window handle removal tool and slightly bend the corners up. 

Kia Rio Manual Window Handle Crank Removal
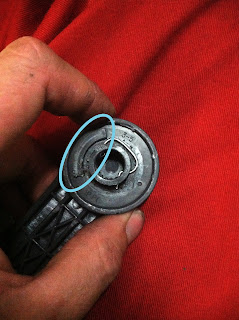
Slowly insert the removal tool, with both handles facing the same direction between the door panel and the plastic friction ring. At the same time you will need to turn the plastic friction ring to get it orientated in the right position to allow you to get the removal tool seated correctly against the retention clip.    

Kia Rio Manual Window Handle Crank Removal
This is what will keep the handle removal tool from being seated correctly against the retention clip.

Kia Rio Manual Window Handle Crank Removal
This is the position the plastic friction ring needs to be in. The only way you'll be able to tell if it's in this orientation is by feeling for the clip with the handle removal tool.

Kia Rio Manual Window Handle Crank Removal
Once it is seated correctly,

Kia Rio Manual Window Handle Crank Removal
Slightly turn the handle and pull off, while keeping the removal tool in place.

Kia Rio Manual Window Handle Crank Removal

Kia Rio Manual Window Handle Crank Removal
Now you should be able to remove a couple screws and have the panel off in no time.
Hope this helps!
- 's


Minggu, 07 April 2013

Jeep Liberty With Infinity Sound System Front Speaker Replacement

If you haven't replaced a pair of from speakers in a Jeep Liberty with an Infinity sound system yet, then this tip may save you a little time in the future.

Jeep Liberty With Infinity Sound System Front Speaker Replacement


Jeep Liberty With Infinity Sound System Front Speaker Replacement
When you take off the door panels and remove the speakers, you will notice each front speaker will have a small amp attached to the bottom. Remove the amps from the speakers, they should just be mounted with a couple of screws. Disconnect the factory speaker, and extend the speaker wires, the Red wires are the positives and the Black wires are your negatives. 

Jeep Liberty With Infinity Sound System Front Speaker Replacement
Unless you are adding a whole new aftermarket sound system and plan on eliminate the Infinity system, your going to want to keep these factory amps functional. The placement of these amps in the front doors when upgrading to aftermarket speakers is VERY IMPORTANT. If you do not move these amps to the right locations they will get in the way of the windows, and most likely damage the glass. You first want to move and place the amps on the out side of the window tracks, closest to the door jams.  

Make sure when you place the amps in the bottom corners, that the heat sink if facing the outside door skin.

Jeep Liberty With Infinity Sound System Front Speaker Replacement
This is what the heat sink side looks like, you don't want this side mounted up against the inside door panel. You want it facing the outside door skin inside the door panel. Otherwise, the amps will overheat. 

Jeep Liberty With Infinity Sound System Front Speaker Replacement
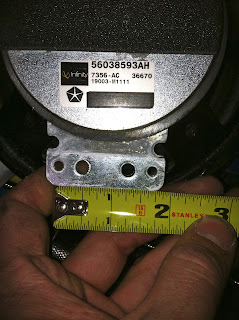
The mounting holes for the amps are (1 11/16 In) apart.

With a Unibit/StepBit drill two holes on the left door panel (1 11/16 In) apart at about a 55 degree angle in the location I have market in the pictures on the left. Make sure the amp and all the wires are not in the way on the other side before drilling. On the right door panel drill two hole (1 11/16 In) apart at about a 135 degree angle in the location I have market in the pictures on the right.

The amps should then mount perfectly, with the harness coming off each factory amp facing up towards the door handle. Note: you will need new longer screws to mount the amps. After the amps are mounted, connect and mount the new speakers and that should be it. Like always feel free to comment or send me an Email if you have any questions. 
- 's


Share

Twitter Delicious Facebook Digg Stumbleupon Favorites More